Lab: Deploy Quarto with GHA
Goals
To get familiar with how the
renvpackage helps create reproducible environments for your R projects.To get comfortable using the terminal for interacting with git and github.
To understand how to authenticate to github using HTTPS.
To practice writing and reading a yaml file.
To understand the basics of a quarto website.
To deploy a quarto site to Github Pages using Github Actions for Continuous Deployment. This will allow you to update your site every time you push a commit to git.
Setup
- To setup your cloud-based development environment create an account using your email at http://rstd.io/class with code
devops_workshop. Click on the Rstudio Workbench widget to start your environment. - Click on
+ New Sessionto create a new Rstudio Pro session.
You can also set up your project in your local IDE but then you will need to install Quarto and other environment dependencies.
Part 1: Create a local Quarto website
Quarto is a multi-lingual open-source scientific and technical publishing system that lets you create documents, articles, blogs, websites, and more.
Open a session in your workbench environment. Give it a name.
To create a new website project within RStudio, click on File > New Project > New Directory > Quarto Website and save it to a directory with a name.
Press render to see your new website! Or preview via terminal with
quarto preview. Make sure that your web browser allows popups. This may take a few moments to install some required packages.Create a repository on github but do not initialize it with a README, license, or gitignore files. This repo will host the files for the site that you will be deploying to Github Pages.
- Name your repository
username.github.iowhere username is your github username. If you already have this name in use, then name your repoquarto_website
- Name your repository
Open the terminal tab in your Rstudio Workbench environment,
cdinto your project directory.Initialize a local git repository with
git init.Rename your master branch to main so that branch names are consistent across your github repo and your local git. You can use
git branchto see what branches exist on your repo and switch between them usinggit checkout <branch>.
# in your terminal
git branch -m master main
Configure your github information in the terminal. To set your global commit name and email address run the
git configcommand with the--globaloption:git config --global user.name "Your Name" git config --global user.email "youremail@yourdomain.com" git config --global init.defaultBranch mainOnce done, you can confirm that the information is set by running:
git config --listCreate a
.gitignorefile in your main directory. Add the following to the file and save:
/.quarto/
/_site/
.Rproj.user
.Rhistory
Part 2: renv workflow
- Exercises:
- Run
.libPaths()to see your library path - Run
lapply(.libPaths(), list.files)to see what is in your library directory
- Run
- Install and initialize an
renvworkflow.
- (Optional) Learning how to use all the power of Quarto is beyond the scope of this workshop but you can use the below resources to play around with difference templates and designs for your new website.
Part 3: Version Control and Authentication with Github
- We will need to securely authenticate from our server environment to the server that lives on Github. You can do this via two different authentication mechanisms - SSH or HTTPS. Note that there are two urls created for your repo on github- one is for https and the other is for SSH.
Authentication:
Copy the https repository URL that you created.
Create a classic personal access token and give it permissions to your repository for “repo”, “user”, and “workflow”. Make sure to note your token somewhere safe.
Install
usethiswithinstall.packages("usethis")Save your PAT with
gitcreds::gitcreds_set()
Version Control:
- Add your files to local version control with
git add .in the terminal. - Commit your files with
git commit -m "my first commit" - Using the https url from github add your github repository as the “remote” with
git remote add origin https://github.com/username/repo_name.git - Push your local files to github with
git push -u origin mainwhere main is the name of your branch in github. You will be prompted for a username and password. Enter your github username and the personal access token from above as your password.
Authentication:
Copy the SSH repository URL that you created.
Generate a new SSH key on your server - open the terminal tab in your Rstudio Workbench environment and type
ssh-keygen -t ed25519 -C "your_github_email@example.com". Press enter 3 times to leave the file path as the default and to leave the passphrase blank.Start the ssh-agent with
eval "$(ssh-agent -s)". Thessh-agentis a key manager for SSH. It holds your keys and certificates in memory, un-encrypted, and ready for use by ssh.Create a new hidden file (dot files and directories are hidden but you can see them with
ls -la) withtouch ~/.ssh/config.Edit the file using vi or vim and then add your SSH private key to the ssh-agent. Use the cheat sheet below for common vim commands.
vim touch ~/.ssh/config
i # to get into insert mode
Host github.com
  IgnoreUnknown UseKeychain
  AddKeysToAgent yes
  UseKeychain yes
  IdentityFile ~/.ssh/id_ed25519
# Press the escape key to exit insert mode
:wq # to save and exit out of the file
ssh-add ~/.ssh/id_ed25519- Copy your public key with
cat ~/.ssh/id_ed25519.pub - In your Github account go to Settings > SSH and GPG Keys, and add your SSH key. Give it a name like “workbench key.”
Version Control:
- Add your files to local version control with
git add . - Commit your files with
git commit -m "my first commit" - Using the https url from github add your github repository as the “remote” with
git remote add origin git@github.com:username/repo_name.git - Push your local files to github with
git push -u origin mainwhere main is the name of your branch in github. Type yes to add github to your list of known hosts.
Resources
To learn more about the Github CLI and the gh package please check out this article.
Part 4: Publish using GHA
- We need to create a
gh-pagesbranch to publish to github pages.
git status # - make sure everything is committed!
git checkout --orphan gh-pages
git reset --hard # make sure you've committed changes before running this!
git commit --allow-empty -m "Initialising gh-pages branch"
git push origin gh-pages
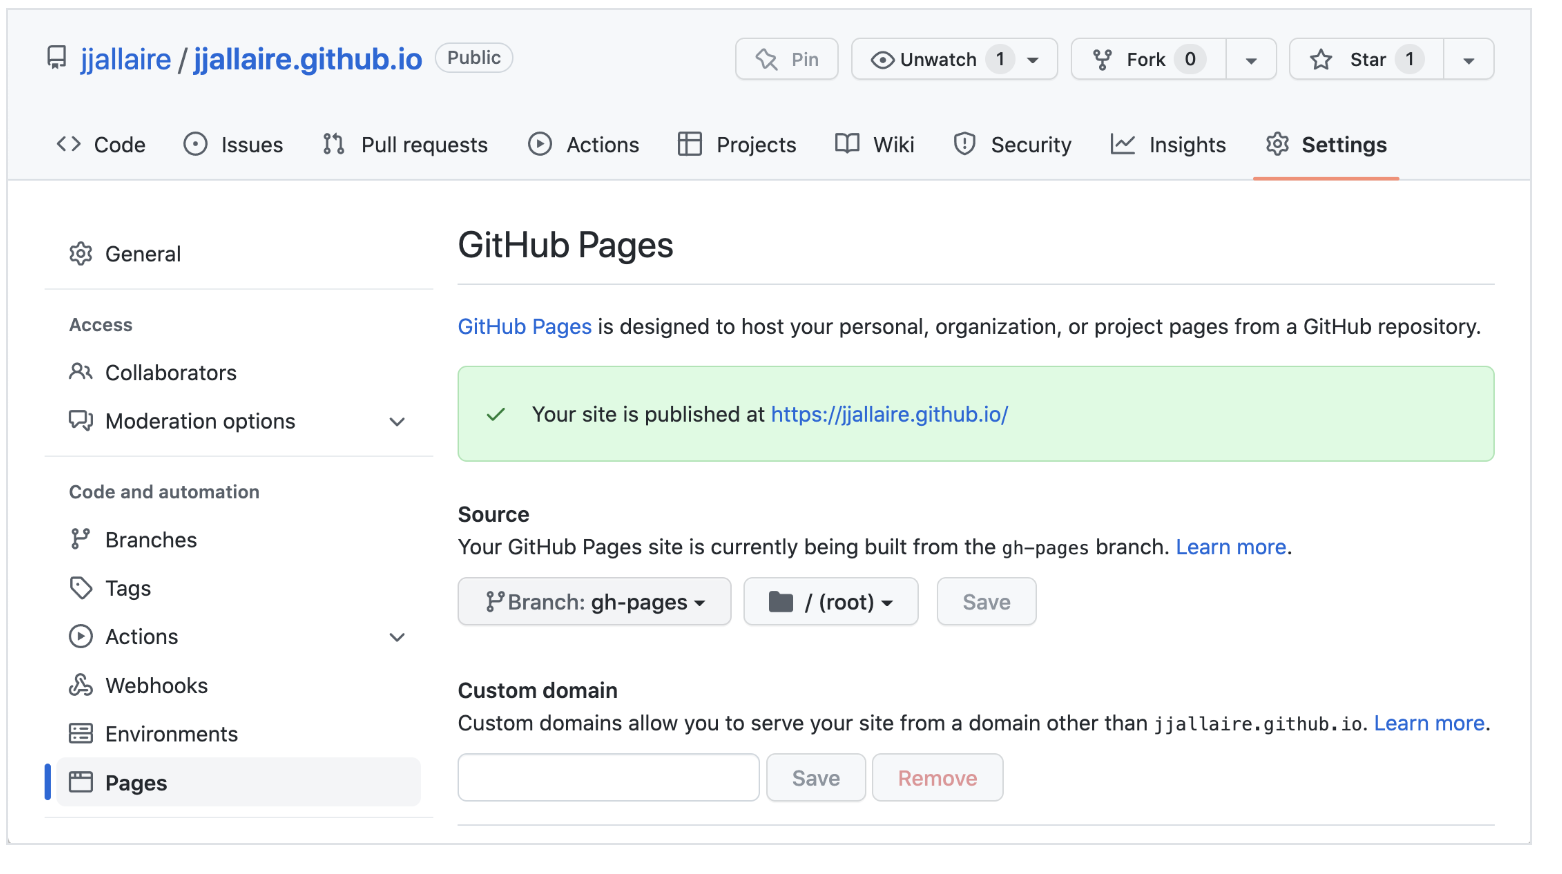
git checkout main- Go to Settings > Pages in your github repository and make sure that your site is being built from the
gh-pagesbranch.

- In your terminal run
quarto publish gh-pagesand click Yes to the prompt to update the site. - Your site should now be live!
- Create a github action called
publish.yamland save it in.github/workflows:
mkdir .github
cd .github
mkdir workflows
cd workflows
touch publish.yaml- Edit the publish.yaml file:
name: Deploy quarto site to Github Pages

on:
  workflow_dispatch:
  push:
    branches: ['main']

jobs:
  build-deploy:
    runs-on: ubuntu-latest
    permissions:
      contents: write
    steps:
      - name: Check out repository
        uses: actions/checkout@v4

      - name: Set up Quarto
        uses: quarto-dev/quarto-actions/setup@v2

      - name: Install R
        uses: r-lib/actions/setup-r@v2
        with:
          r-version: '4.2.3'
          use-public-rspm: true

      - name: Setup renv and install packages
        uses: r-lib/actions/setup-renv@v2
        with:
          cache-version: 1
        env:
          RENV_CONFIG_REPOS_OVERRIDE: https://packagemanager.rstudio.com/all/latest

      - name: Render and Publish
        uses: quarto-dev/quarto-actions/publish@v2
        with:
          target: gh-pages
        env:
          GITHUB_TOKEN: ${{ secrets.GITHUB_TOKEN }}
Snapshot your
renvenvironment withrenv::snapshot.Commit and push your code: (Make sure that your renv.lock file has been added!)
git add .
git commit -m "created action"
git push- Go to the actions tab in your Github repository and watch your deploy!
Part 5: Publish to Connect with GHA
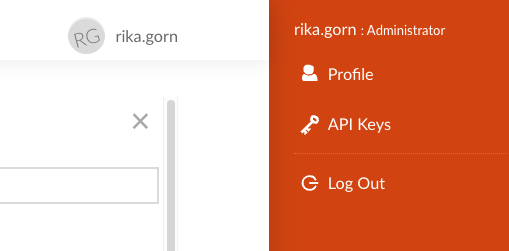
- Create an API key on the Connect website. Note this API somewhere safe as you will be using it multiple times in this workshop.

- Add the Connect URL and your API key to your Github repository:
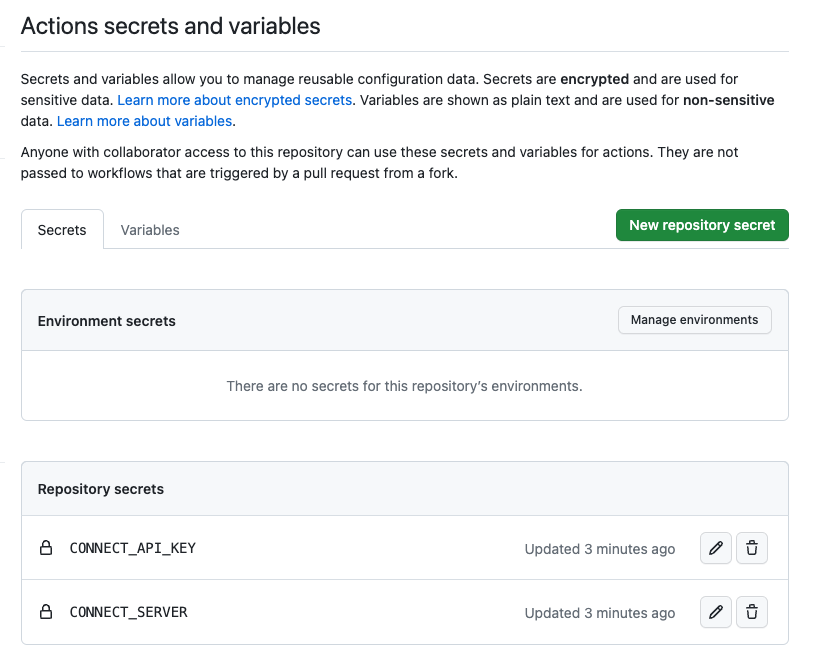
In your repository go to Settings > Security > Secrets and variables > Actions
Add 2 secrets:

- The rsconnect package needs to be explicitly called in your code to be correctly snapshot in your lock file. Install it and call it in one of your files.
install.packages("rsconnect")
library(rsconnect)
renv::snapshot()- Edit your publish.yaml file:
---
on:
  workflow_dispatch:
  push:
    branches:
      - main
name: Quarto and Connect Publish
jobs:
  build-deploy:
    runs-on: ubuntu-latest
    permissions:
      contents: write
    steps:
      - name: Check out repository
        uses: actions/checkout@v4
      - name: Set up Quarto
        uses: quarto-dev/quarto-actions/setup@v2
      - name: Install R
        uses: r-lib/actions/setup-r@v2
        with:
          r-version: 4.2.3
          use-public-rspm: true
      - name: Setup renv and install packages
        uses: r-lib/actions/setup-renv@v2
        with:
          cache-version: 1
      - name: Render and Publish
        uses: quarto-dev/quarto-actions/publish@v2
        with:
          target: gh-pages
        env:
          GITHUB_TOKEN: ${{ secrets.GITHUB_TOKEN }}
  test-and-connect-publish:
    runs-on: ubuntu-latest
    steps:
      - name: Check out repository
        uses: actions/checkout@v4
      - name: Set up Quarto
        uses: quarto-dev/quarto-actions/setup@v2
      - name: Install R
        uses: r-lib/actions/setup-r@v2
        with:
          r-version: 4.2.3
          use-public-rspm: true
      - name: Setup renv and install packages
        uses: r-lib/actions/setup-renv@v2
      - name: Create manifest.json
        shell: Rscript {0}
        run: |
          rsconnect::writeManifest()
      - name: Publish Connect content
        uses: rstudio/actions/connect-publish@main
        with:
          url: ${{ secrets.CONNECT_SERVER }}
          api-key: ${{ secrets.CONNECT_API_KEY }}
          access-type: logged_in
          dir: |
            .:/github-actions